
Hey, it’s Emily from @team_orosco! Today I’m going to be showing you a few different ways to get the best bang for your buck out of the gorgeous Isee Pixie Poncho pattern!
I love find patterns that can be molded into just what the line drawings are. The Pixie poncho is already a must have, but you can find some fun and creative ways to get completely different looks using this one pattern!
Today I’ll show you four different ideas- a regular Pixie Poncho, a Pixie Poncho turned in to a dress, a Pixie Poncho made into a fun ghost Halloween costume, and a cowl necklace Pixie Poncho!

1. The original Pixie Poncho! Just a staple piece that is cute as can be- we LOVE pairing it with the poppy pants but leggings are great too! I used the Isee Sequoia fruit print (cotton Lycra) and Sequoia slub for the pants! It was perfect for this hot Texas fall. I added an Isee pom because it just adds that special touch!

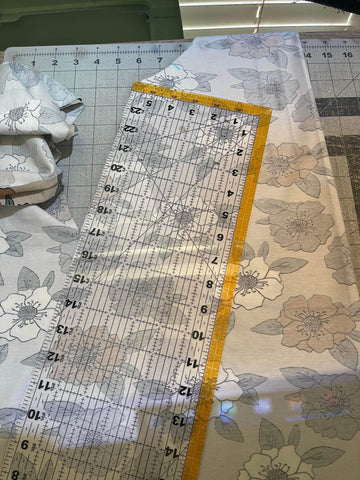
2. The Dress length Pixie Poncho! This look was so easy to achieve. First I measured my little model from shoulder to where I wanted the dress to hit. I lengthened a bit on the sleeves and dress to last all year but would be super cute just above the knee too! I grabbed my measuring ruler and starting at the bottom of the arm cycle I followed the original line and just continued swinging out until I reached the appropriate length. That’s it! An elongated pixie poncho makes a quick and darling dress! I will be making one in short sleeves next and will be sure to share.


3. The ghost costume! I used Isee hemp spandex French terry, if you haven’t sewn with this fabric is is the softest/coziest French terry ever! For this look, I simply swapped the pixie for a regular hood and added fringe! On this example I used the free lowland kids hoodie for the hood. For the appliqué I cut out two eyes and a smile using Isee faded black French terry. I ironed on some interfacing and stitched on the front. For the fringe, I just cut two rectangles about 3.5” and serged it right on. I then used my rotary cutter to cut along the hem for the fringe look! My model is 13m old wearing a 6-12m size! The best part is this fits my 3 yo as a cute hoodie that she will pair with black leggings!

4. The cowl neck, short sleeve poncho! This look was also fairly easy. I cut the sleeves at the length I wanted for short sleeves. I used a cowl neck from the peekaboo Sophie swing dress pattern BUT you can use anything you have on hand! (you can also just make a super thick neckband and fold it down for more of a turtle neck look) the only adjustment I made was measuring the neck opening and lengthening my band to match so there wasn’t any stretching! If you do a mock neck or turtle neck I’d do the band 80% or so of the opening depending on fabric type.
I hope you love these looks as much as I do! I can’t wait to see the fun poncho creations from all of you talented Sewist! Xoxo Emily